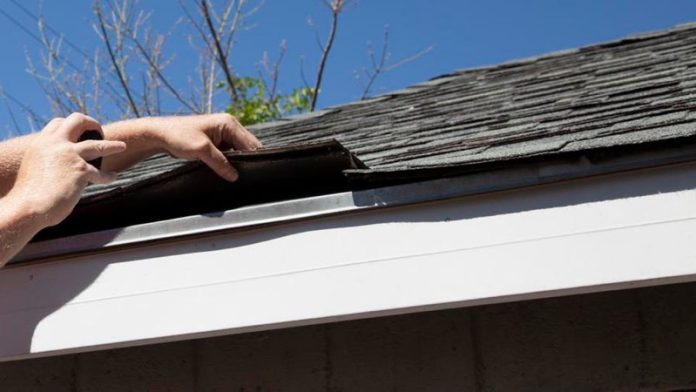
A mechanical system constitutes your roof. It could seem to be a somewhat unimportant aspect of your home. But, just like the HVAC (heating, ventilation, and air conditioning), plumbing, and electrical systems in your house, your home’s roof needs to be checked and maintained regularly to ensure it works well.
When someone refers to a “roof inspection,” they are alluding to a comprehensive examination of all of the roofing components that may be found on or inside your home. The purpose of the inspection is to determine how well your roof is functioning at the moment and what, if anything, needs to be done to address any issues that may have been discovered during the course of the inspection. These are the main steps to follow for a roof inspection.
Check the Gutters on Your Roof
The first thing we do while inspecting a roof is look at the gutters, and this is done before even examining the shingles themselves. Gutter condition is a significant indicator that your roofing contractor knows what he’s doing and is competent to handle the work when he can provide you with a detailed report.
It’s essential that a contractor thoroughly investigate the gutter installation technique. The gutters are connected by the drip edge, which cannot be changed, as is the situation here.
During the inspection of gutters, the contractor should also look at the underlayments for the presence of any components and to better understand how the roof was originally made.
Assess the Flashing on Your Roof
Another crucial aspect a contracting agency should consider when providing an estimate is the flashing. They won’t be able to determine if it has to be changed and what sort of flashing it is without climbing up on the roof.
The flashing has to be maintained in excellent condition since it is the major water entry point. We cannot emphasize how crucial this is. Although flashing is a fairly minor component of a roof, it may cause significant surface damage if it is affected. Do your best to look deeper into any damaged flashing to find issues that may be hiding under the surface.
Watch Out For Any Skylights
Whenever the roof is re-roofed, it is likely that most of the skylights will also need to be replaced. The lifespan of the majority of skylights is between 18 and 22 years.
Although your skylight may be in fine condition right now, it is coming to the end of its usable life, it may be easier and more cost-effective to replace it with the rest of your roof. This is especially true if it is getting closer to the end of its useful life. If you are already working on your roof to repair or replace it after it has been damaged, removing and replacing a skylight is far simpler, which is an intrusive procedure for your roof.
Inspect the Soil Piles
The contractor is responsible for inspecting the sol stacks for any cracks or other problems that may exist. This is another seemingly small roof component that must be fastened securely. You are not recommended to replace the dirt stack boot with a less expensive one.
If you find that a soil stack or the area surrounding it has been damaged, you need to make sure that this is included in your estimate. Even though there are a wide variety of choices for a replacement, it is better to make an investment rather than a fast repair. If you put back a soil stack that will fall apart before you need to fix your roof again, you’ll just make things harder for yourself in the future.
Check the Chimney
The chimney is also one of those areas that require regular checking on the roof. This is particularly important to keep in mind when it comes to ensuring that the chimney is equipped with a saddle or cricket that directs water away from it. If you don’t take this precaution, any precipitation that falls or slides into the chimney during a storm might potentially cause damage and leaks.
Examine the Attic
Check that the contractor inspects your basement and attic before hiring them. In particular, they should look into how well your attic breathes and see if there is any rotting wood on the roof.
A brief excursion into the attic may provide a wealth of information on the roof’s state and the level of danger to which it has been exposed over the preceding years. If the insulation isn’t good enough, check the roof carefully for too much wear since the extra heat that would escape would cause it to leak.
Break Down the Costs
The estimate that a contractor gives should definitely include these more specific details as well as more general overview information, like what kind of shingles will be used and when the project is expected to be done.
You shouldn’t be afraid to question the job that the contractor who worked on your roof accomplished if they didn’t take the time to examine it carefully after they were finished. If you are looking for someone to work on your roof, you do not want to take any risks by selecting the least expensive choice.
Conclusion
After you have finished the roof inspection using these straightforward suggestions, set aside some time to go over the results. Have you come across any potentially problematic locations or significant causes for concern? In such a case, you should immediately get in touch with a qualified expert in your area. Always keep in mind that an astute homeowner is also an active homeowner! You might avoid big problems in the future if you deal with small problems or worries before they turn into full-blown crises.


